Saturday, November 12, 2011

Planting Bulbs: Pay it Forward


If you can yet poke a shovel into the ground, there's still time to plant bulbs.  With a few short steps, a bag of bulbs can be quickly tucked away in the garden, ready for a sweet surprise in the spring.

Bulbs are a gardener's gift for the next season.

First, gather the minimal items needed--shovel, bulbs, and baby powder or foot spray.  (No that's not a typo, the dollar store variety will do.)  Toss them into a wagon, cart or bucket (five gallon paint variety works well.) 

Second, chose a spot. 

Third, dig one large hole of the approporiate depth.  The depth measurement is usually on the ourside of the bag.  For a dramatic effect, dig several holes in a row.

Fourth, drop in five to seven bulbs, arranging them in a rosette shape, with the "frilly" side down.  Don't worry if bulbs are planted upside down, they always right themselves.

Fifth, add a shot of medicated foot or baby powder.  Makes the bulbs a less attractive lunch for squirrels. 

Option:  a shot of bone meal or organic mulch.  Or, grab a small handfull of leaves, tear them up and tuck 'em in around the bulbs.

Cover with soil, mark and walk away.  Let nature take over.
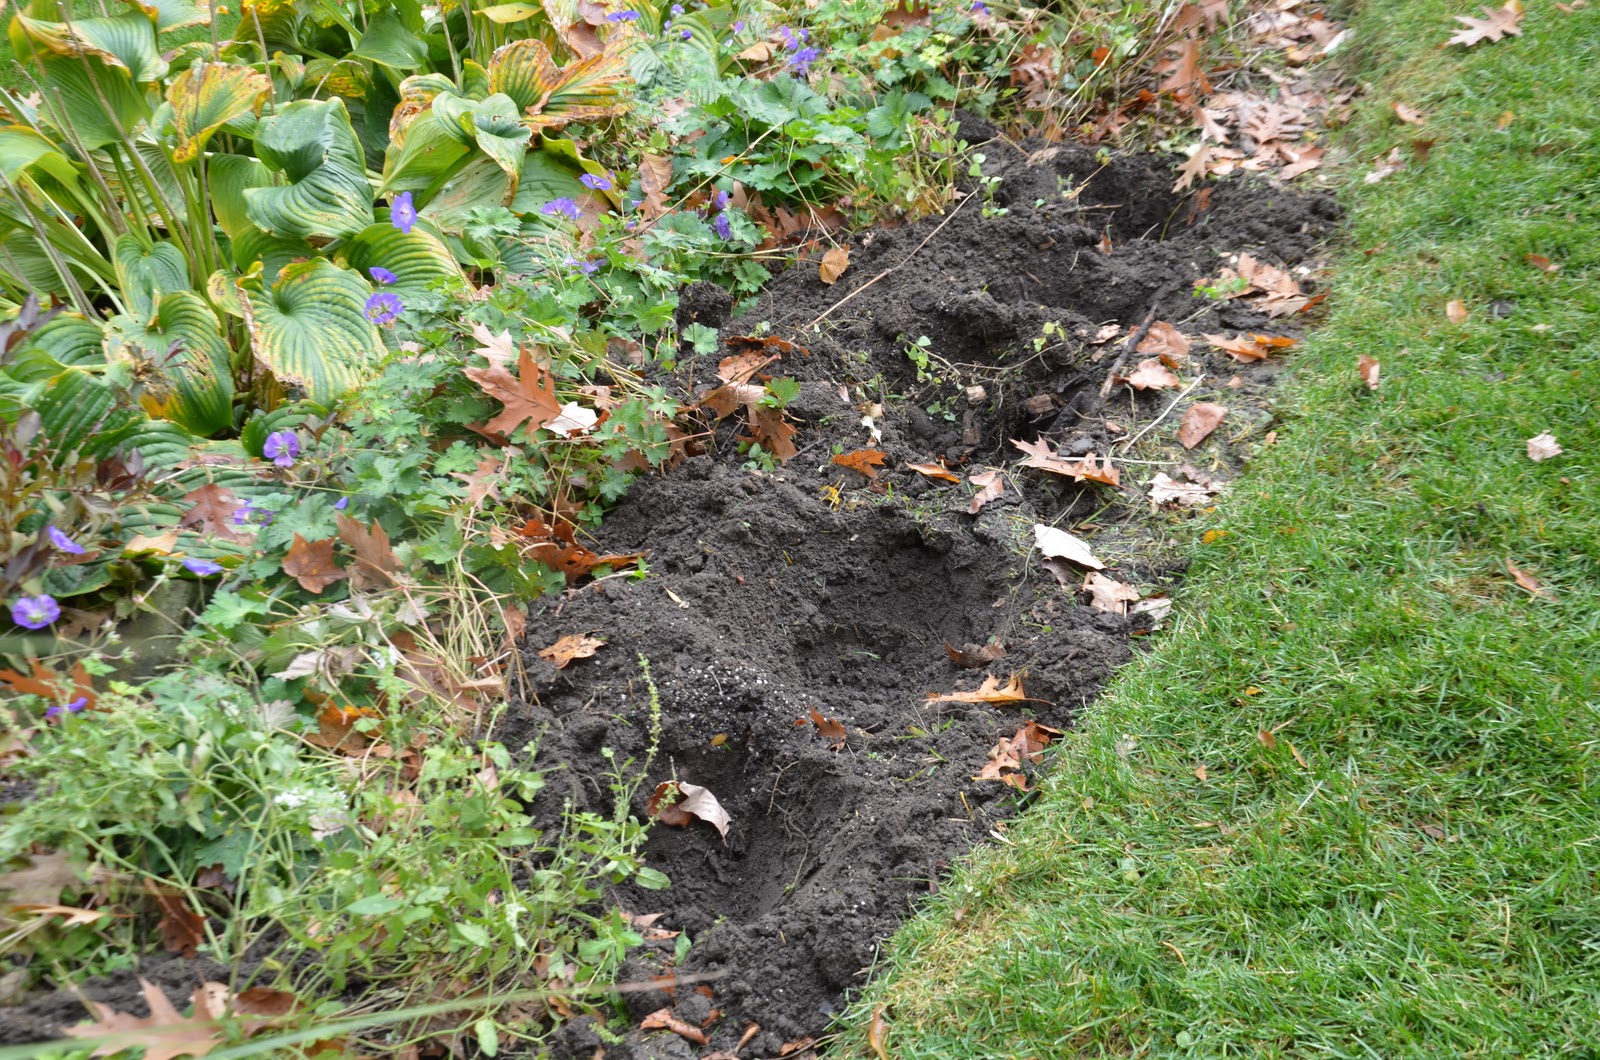
Never plant in individual holes or they'll emerge looking like a row of teeth, bad teeth if  intermittent bulb failure occurs. 

Almost as soon as bulbs are planted, they're forgotten.  Until, of course, when they make their grand appearance.  To avoid planting in the exact same spot repeatedly, small flat wooden sticks like those found in the center of popsicles are helpful.

Plant spring blooming bulbs like tulips, daffodils and crocus in the mid to late fall.  They require six to eight weeks of ground freeze to bloom.  Zone Five and a Half is perfect for most tulip and narcissus (daffodil) bulbs.  One more advantage of a long cold winter.

Late in the season, it's easy to shy away from planting, citing garden fatigue and the tediousness of digging all those holes.  When we are really out of time, a shovel stuck into the ground, pushed forward to create an open wedge, insert the bulbs (which can be predusted with powder) pull out the shovel, pat down the soil, and the job is complete.  This last method is far easier with two.

Think about location.  Where in the spring garden could the landscape use some oomph?  Maybe along the pathway to the front door, or outside the kitchen window? A primo place to plant is between hosta.  The hosta unfurls its leaves just as the bulb's foliage is dying back and there's no need to cut back, leaving less work at a busy time in they yard.


Healthy bulbs are firm, and not squishy or permeated with holes.


The investment of a few moments in the fall can pay off in dividends for many seasons to come.


Burning Bush and other Fall Follies


There's a big shrub in the back of my yard.  I  don't know how it got there, or when it first appeared.  Most of the year it's unruly and tries to muscle out the other inhabitants.  As I trim the octopus-like branches for the gazillionth time, I threaten to terminate its reign of terror.

Every fall the burly bush gets a reprieve.

When our dog Ralph chews on a nice stacked wood heel or bites the tassel off a leather loafer, he's assured he's avoided near destruction 'cause he's so darned cute.  Same goes for that unruly burning bush in the yard.  It's lucky to be so spectacular in the fall.  Sometimes prolonged irritation is worth the moment of glory.  Ask any parent of teenagers.

Whoever dubbed these "burning bushes" clearly had a knack for names.  In the fall, just as the final golden leaves drop from the maples, the "show of red" begins.  The finale to the autumn color review does not disappoint.  The absence of  golds and greens make the scarlet leaves stand out without distraction.

In winter the wayward brances add structure to the winter garden when grasses and wintergreens are weighed down by snow.


The burning bush can be the first pruning project in early spring.  In late February or early March it's easier to trim the shrub when the "y" junctions are apparent and unobscured by leaves.  No brushcuts across the top.  Cut at varying depths within the plant focusing on the older, thicker branches.  Always cut at a branching point with a pair of hand lopers. 

Stick the cut stems into an outdoor pot or windowbox filled with soil.   Many of the branches will unfurl tiny leaves.

The BB is not the only colorful garden character in the fall.  Hosta turns a bright gold, grasses sprout burgundy tassels and turtlehead mellow to soft yellow.  Gracefully towering over it all, the red leaves of the Japanese Maple gleam in the autumn sunlight. 

Every garden plant has its peak moment.  The key is to stagger plantings not only for size and blooms but for show, whether it be spring blossoms or fall foliage. 


The garden's an ever changing palate.  Each player shines at different times.

The perfect time in the yard is any time you are able to spend in it. 

Related Articles:

How to Trim Shrubs -- No More Bad Haircuts

Green Fences -- Boxwood Hedges to Hydrangea Hedgerows


Friday, October 28, 2011

Fall Garden Clean Up and Pumpkin Patches


The bright orange of the pumpkins which remain in the garden are a sharp contrast to the browned stems and overcast sky above and below.  Fall is here and it's decision time.  Clip back or leave nature alone to do her work?  Rake the beds clean or allow the leaves to stay?  Surprisingly less is more in when the leaves turn gold.  Wooded areas are the best example.  That colorful carpet is mostly gone once the snow recedes.  Those piles of leaves at the curb are the key to fertile soil. 

In a perfect gardening world, we'd have the time and equipment to finely shred leaves and garden clippings then gently sprinkle them around the base of precisely clipped back plants.  But lives and jobs and a little bit of fall fun take precedence--and soon it's time to wrap the holiday gifts.

Still, in a quick and easy green gardening world, it is possible to develop a system that is eighty percent nature and twenty percent gardener. Nature is meant to do the work--so let her.

Leave a nice layer of leaves on flower beds and at the base of shrubs as a natural mulch. 

Most annuals can stay.  They'll disintegrate beneath the winter blanket of snow. Impatiens, for example will shrivel up and disappear after a few weeks of cold. What's left can be swept out by hand in early spring.  The decaying root system will naturally integrate the soil with valuable nutrients, so leave them in place. Pick a spot in the yard, and start a compost of potted plants and large scale clippings.  Consider the neighbor's line of sight when chosing a location.  The back of the garage may be out of sight for you, but a direct hit from the Addams family room. 

Clip the top third from sturdy stemmed perennials like phlox and shasta daisies.  The remaining stems will collect snow and assist in the insulation of roots from the freeze and thaw of winter. For winter interest keep big headed plants like sedum and hydrangea intact.  Do not ever cut back early spring blooming or wooded plants and shrubs like rhododendron, hydrangea, butterfly bush or lilac in the fall. These should be trimmed, if needed, right after bloom in the spring. 

Grasses can be left until the spring.  They look spectacular after a snowfall.

Take the basket from the mower and mulch leaves into the lawn.

Reduce the pile at the curb and increase the energy in your garden.  Nice balance.


Now, head for the pumpkin patch.